Valentine Craft Idea | Photo Holders
It doesn’t get any easier than this vibrant Valentine craft! Charming DIY photo holders make a sweet gift and an even sweeter display.

One of my sweet spots is a DIY that is easy enough to do with kids but cool enough to want to do as an adult.
This is one of those!
These charming Valentine crafts come together incredibly quickly, and have a great payoff. They make lovely gifts – unless you decide to keep them for yourself!
Psst — before you dive into the tutorial, be sure to enter your info below to join our VIP group. I’ll send more of my very best DIY and holiday ideas straight to ya!
DIY Valentine Photo Holders
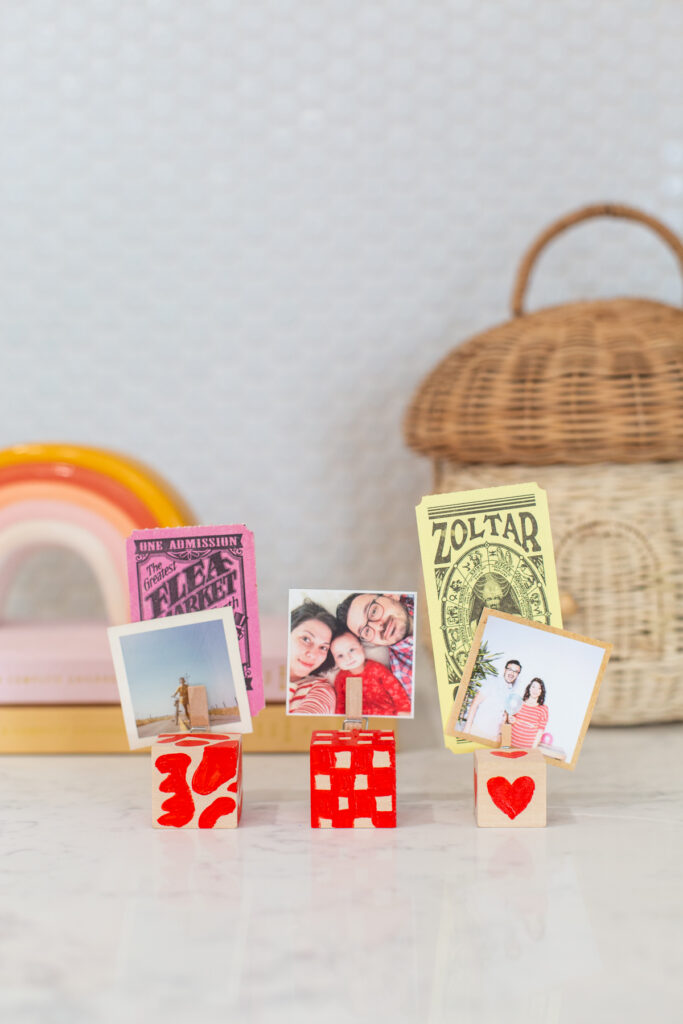
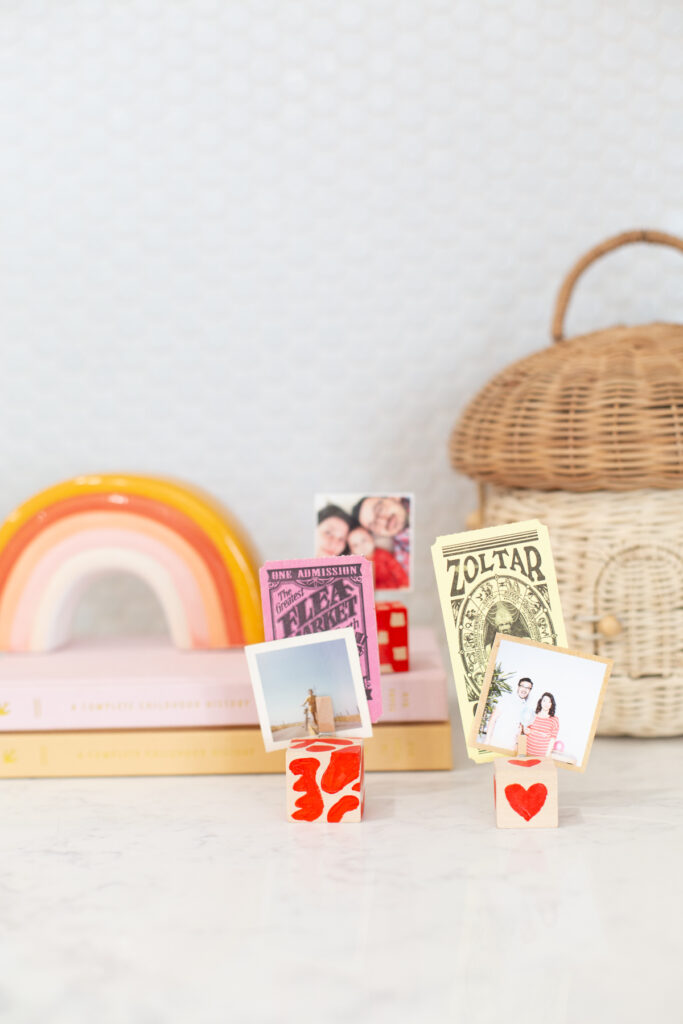
It’s a simple idea but super effective! The wooden block acts as a weight and a simple mini clothespin holds onto a photo to display.
I also love using these photo holders to display all of the little bits and pieces of ephemera I’ve collected over the years.
Old photo booth pictures, concert ticket stubs, or even (like I added to mine) a Zoltar ticket.
These are particularly fun in a kids’ or teen’s room, dorm rooms included! They don’t take a lot of space so it’s easy to tuck onto a shelf or ledge.
More Valentine Gift Ideas
These make amazing gifts, but we’ve got a whole library full of ideas if you need more!
I took a moment to round up some of my favorite Valentine gift ideas from our archives for you below. Be sure to pin your favorites so that you can find them easily again once you’re ready to get crafty.
- DIY Valentine’s Day Gift for Your Bestie
- How to Make Pop Up Valentine Cards
- Make a Valentine Shirt with Gold Iron-On Foil
- DIY Valentine Garland for Gifts or Decor
- Valentine Idea // DIY Paint Chip Garland
- White Chocolate Dipped Rice Krispies Valentine Treats
Supplies You’ll Need
Plain Wooden Blocks. These comes in many sizes. The larger of the ones I used are 1.5″ blocks, which is a nice size for this project. This pack has an assortment of sizes, but you can also find these easily at your local craft store.
Mini Clothespins. For this project I like this size of clothespins. They’re strong enough to hold photos but small enough to fit on the blocks.
Craft Paint. If you need to build your collection, here’s a set with lots of great colors.
Paintbrushes. This set of brushes is always on hand in my craft stash for both my projects and my kids’ projects.
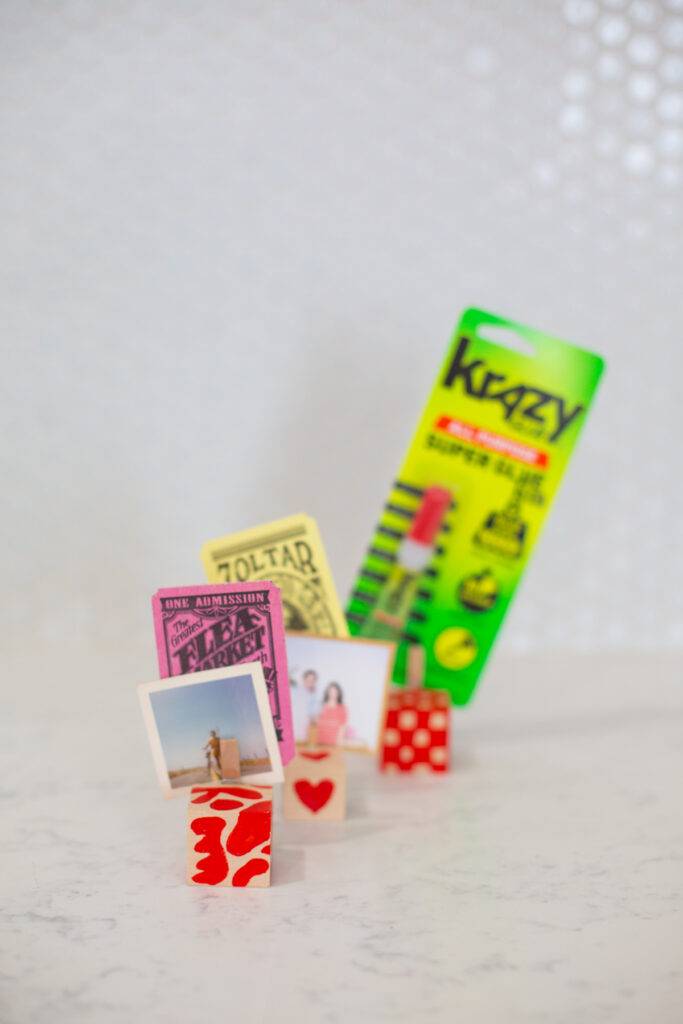
Krazy Glue or Glue Gun. I really like the bond that Krazy Glue creates when you use it on wood, it’s the strongest I’ve found for craft projects. But if you don’t have any on hand a glue gun will do the trick!
How to Make a Photo Holder Valentine Craft
- Wipe your blocks to make sure they’re free of any dust or debris.
- Add a strip of Krazy Glue to one side of your clothes pin. Don’t add any glue to the end that will hold the photos (this end will protrude above the block). Only add glue to the end that you would usually squeeze; this is the part that will be glued to the block.
- Press the pin and the block together and hold for a few seconds while it sets. Allow to fully dry for an hour or so.
- Next, use a fine tip paint brush to paint patterns on your cube. No need to paint a pattern on the bottom where the photo holder will rest.
- Once you’ve painted your patterns, allow the photo holders to completely dry and add your photos!

Hope you enjoy this quick and simple Valentine craft! xoxo
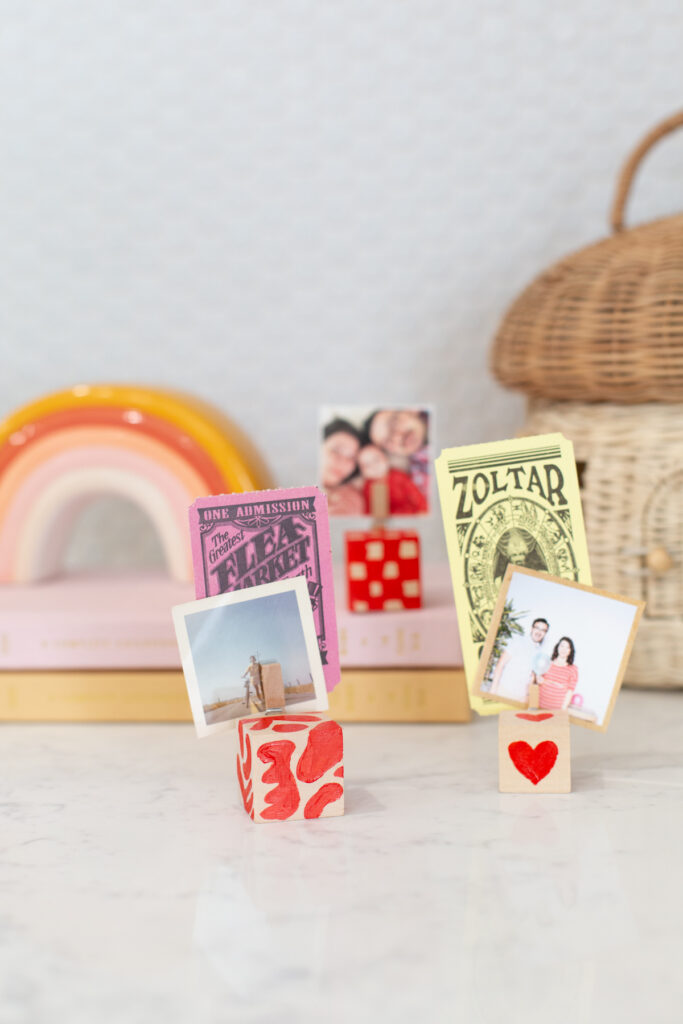
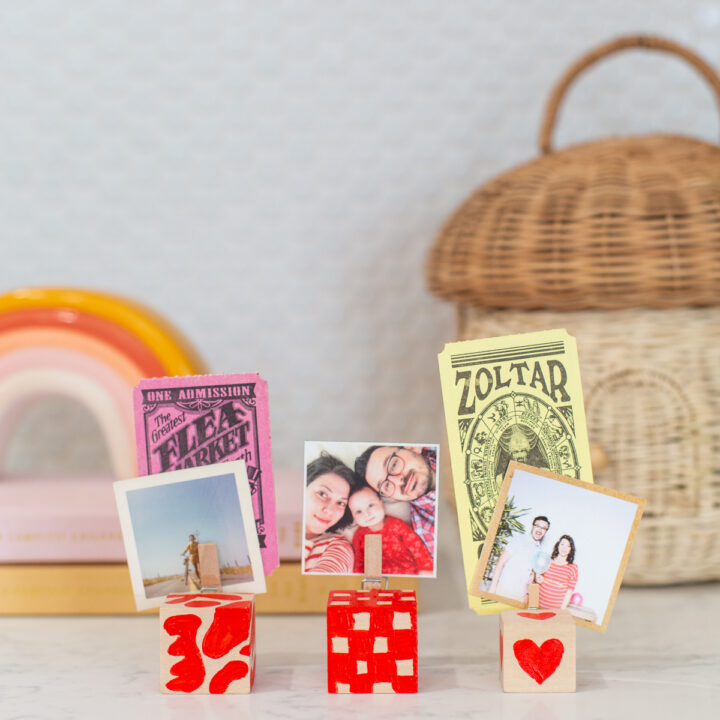
Photo Holder Valentine Craft
It doesn't get any easier than this vibrant Valentine craft! Charming DIY photo holders make a sweet gift and an even sweeter display.
Materials
- Plain wooden blocks
- Mini clothespins
- Krazy Glue
- Craft paint
Tools
- Paint brushes
Instructions
- Wipe your blocks to make sure they're free of any dust or debris.
- Add a strip of Krazy Glue to one side of your clothes pin. Don't add any glue to the end that will hold the photos (this end will protrude above the block). Only add glue to the end that you would usually squeeze; this is the part that will be glued to the block.
- Press the pin and the block together and hold for a few seconds while it sets. Allow to fully dry for an hour or so.
- Next, use a fine tip paint brush to paint patterns on your cube. No need to paint a pattern on the bottom where the photo holder will rest.
- Once you've painted your patterns, allow the photo holders to completely dry and add your photos!
Notes
It's a simple idea but super effective! The wooden block acts as a weight and a simple mini clothespin holds onto a photo to display.
I also love using these photo holders to display all of the little bits and pieces of ephemera I've collected over the years.
Old photo booth pictures, concert ticket stubs, or even (like I added to mine) a Zoltar ticket.
These are particularly fun in a kids' or teen's room, dorm rooms included! They don't take a lot of space so it's easy to tuck onto a shelf or ledge.
This post contains affiliate links for your convenience. This means that I receive a small commission should you make a purchase via one of these links, at no additional cost to you. Thank you as always for your support!

You can also add a special charm to your photos if you use these cute Valentine’s Day photo holders, and I recommend trying to make them in the style of film photography. This will give your shots a nostalgic mood and emphasize the warm moments. You can learn how to make your photos look like film by using special editing tools. This effect will definitely add more charm to your holiday photos.
could these be decorated with markers rather than paint?