Valentine Decor Idea // DIY Paint Chip Garland
A Valentine decor idea that you can create for free! Check out this simple tutorial on how to make an adorable Valentine paint chip garland.


Just a teeny-tiny, super-simple little project for you today! If you play your cards right, you can even make it for free.
I have this little paint chip Valentine garland hanging up above my desk and I love it so much I wanted to share.
Psst — before you dive in, be sure to bookmark these other Valentine’s Day ideas!
- Free Printable Valentines (With Mini Figurines!)
- An Easy Valentine Craft with a Free Printable
- 30 Valentines Date Ideas You Haven’t Thought Of
- Baby Yoda Valentines that Everyone Will Love!
- A Valentine Garland with Extra Sparkle
- How to Make Petit Fours for Valentine’s Day
And be sure to sign up for my VIP group below, where I’ll send more of my very best Valentine ideas straight to ya!
You Can Make this Valentine Decor for Free!
One of the reasons I love this easy Valentine decor so much? You can probably make it without spending a cent!
The main supply here is colorful paper that comes in the form of paint chips from your local hardware or paint store.
You can browse and collect the paint chip samples for free, and you’ll probably have the rest of what you need already.

A Fun Valentine Color Palette
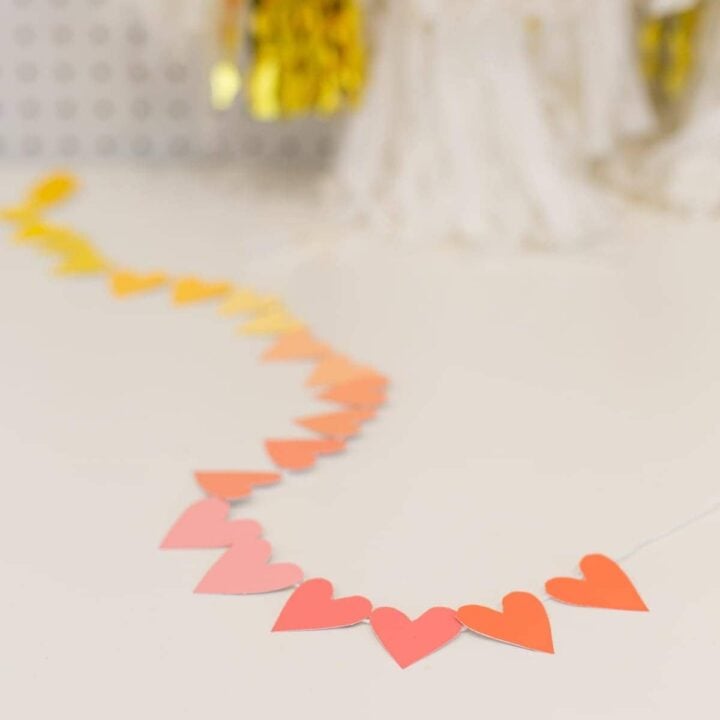
I happened to have a bunch of these paint chips left over from a few painting projects, so I gathered some chips to create a fun, unusual Valentine’s Day color palette.
You know I like to add a little yellow wherever I can!
But if you’re collecting paint chips specifically for this project, you can get creative and choose your own color palette.
A few different reds could create some really beautiful ombre Valentine decor as well.
How to Hang Your Garland
This garland is light and delicate, so you could do something simple to hang it and it would be just fine! It looks adorable and festive with just some washi tape on either end.
If you’d like a more finished way of hanging it, I always recommend Command Hooks. This type is small and clear, so it won’t detract from the Valentine decor.
Ideas for Displaying Your Valentine Decor
I think this garland would look adorable just about anywhere! But if you need some inspiration, here are a few ideas of where you could display it:
- on a mirror
- over your desk
- over a doorway
- on your kitchen cabinet
- attached to your child’s backpack
- on your computer
- strung on a bar cart
- hanging from a doorknob
Materials for Your Valentine Decor
Materials
- paint chips from your local paint store
- embroidery thread, yarn, or baker’s twine
- glue gun (or any other glue you might have)
- scissors
Make Time: 20 Minutes
How to Create a Paint Chip Garland for Valentine Decor
- Start by gathering all of your paint chips in your desired color palette.
- Cut your paint chips into rectangles or squares first to make sure the hearts are all roughly the same size.
- Arrange the rectangles in an order or sequence that you like.
- Cut little hearts out of each color, keeping them in order. I like the way they look cut freehand, but you could also trace a heart if you’d like a more uniform look.
- Place a dot of hot glue on the back of each heart (in the center toward the top) and sink the embroidery thread into the glue. Continue until all the hearts are in place. Note: if you’re using another type of glue, you’ll just need to give this step some extra drying time. I like hot glue because it dries within a minute or so.
- Continue gluing hearts onto the thread or yarn until you are happy with your garland!


That’s it! It’s just so charming. I love that it’s a little different and unexpected for Valentine’s Day. So fun!
Hope you give this one a try. xoxo


This post contains affiliate links for your convenience. This means that I receive a small commission should you make a purchase via one of these links, at no additional cost to you. Thank you as always for your support!
DIY Paint Chip Garland Valentine Decor Idea
This charming garland is adorable for Valentine's Day, and you can make it for free!
Materials
- paint chips
- embroidery thread, yarn, or baker's twine
- glue gun or other type of glue
Tools
- scissors
Instructions
- Start by gathering all of your paint chips in your desired color palette.
- Cut your paint chips into squares first to make sure the hearts are all roughly the same size.
- Arrange the squares in an order or sequence that you like.
- Cut little hearts out of each color, keeping them in order. I like the way they look cut freehand, but you could also trace a heart if you'd like a more uniform look.
- Place a dot of hot glue on the back of each heart (in the center toward the top) and sink the embroidery thread into the glue. Continue until all the hearts are in place. Note: if you're using another type of glue, you'll just need to give this step some extra drying time. I like hot glue because it dries within a minute or so.
- Continue gluing hearts onto the thread or yarn until you are happy with your garland!

